Roofing & Skylights - Part I
The following post contains affiliate links. To learn more about what this means, please visit our disclosures page here.
Exciting things happening at the tiny house this month! We have begun to install the metal roofing, as well as our skylights!
I did some shopping around for a standing seam metal roofing system that would be somewhat easy for us to learn how to install. A good friend of ours - also installing metal roofing on his house this summer - discovered www.bestbuymetals.com. This company, based out of Tennessee, offers many metal roofing options, including (3) different standing seam systems.
We ordered our system from them and it came within the month.

It is a hidden fastener system that we were delighted to find fairly simple to install! The website provides details that you can choose from when you order, and it also makes it easy to keep the different components straight when you are installing step-by-step.
First, we nailed down the drip edge along the eave’s fascia:
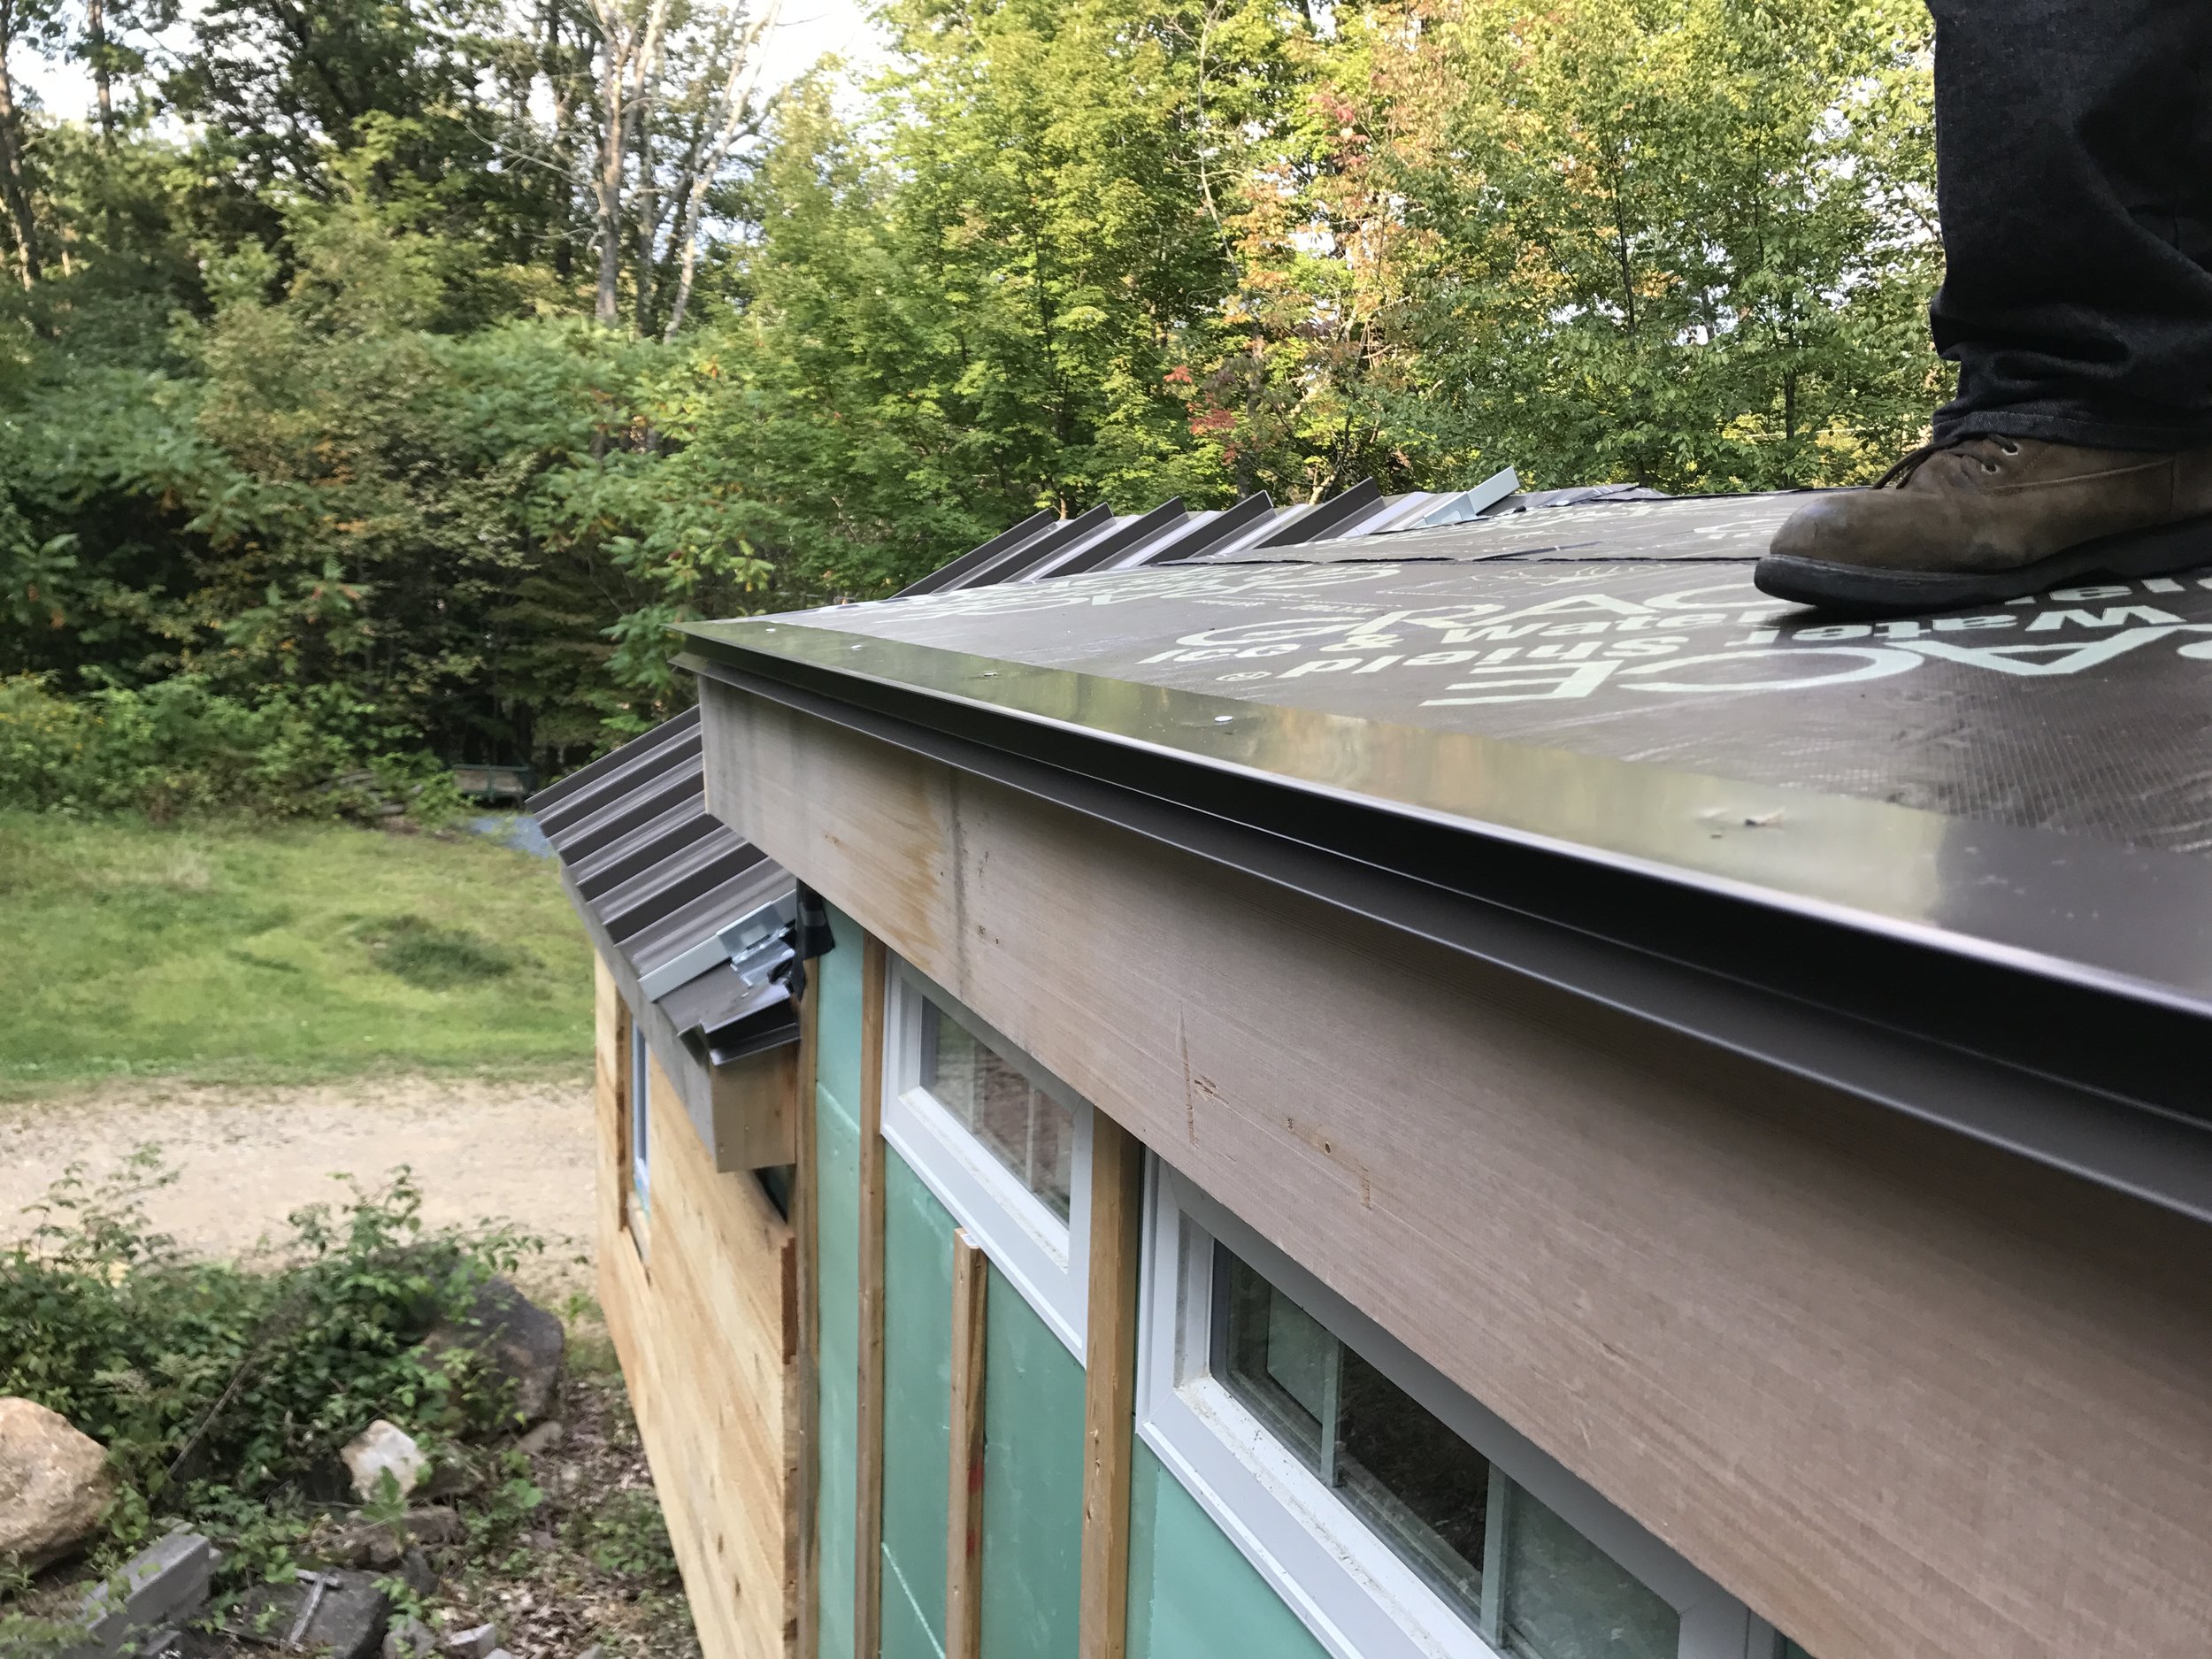


To prep the panels for installation, we used an 18” metal seamer to bend the ends down and under the back of the panel so that they grab onto the drip edge.
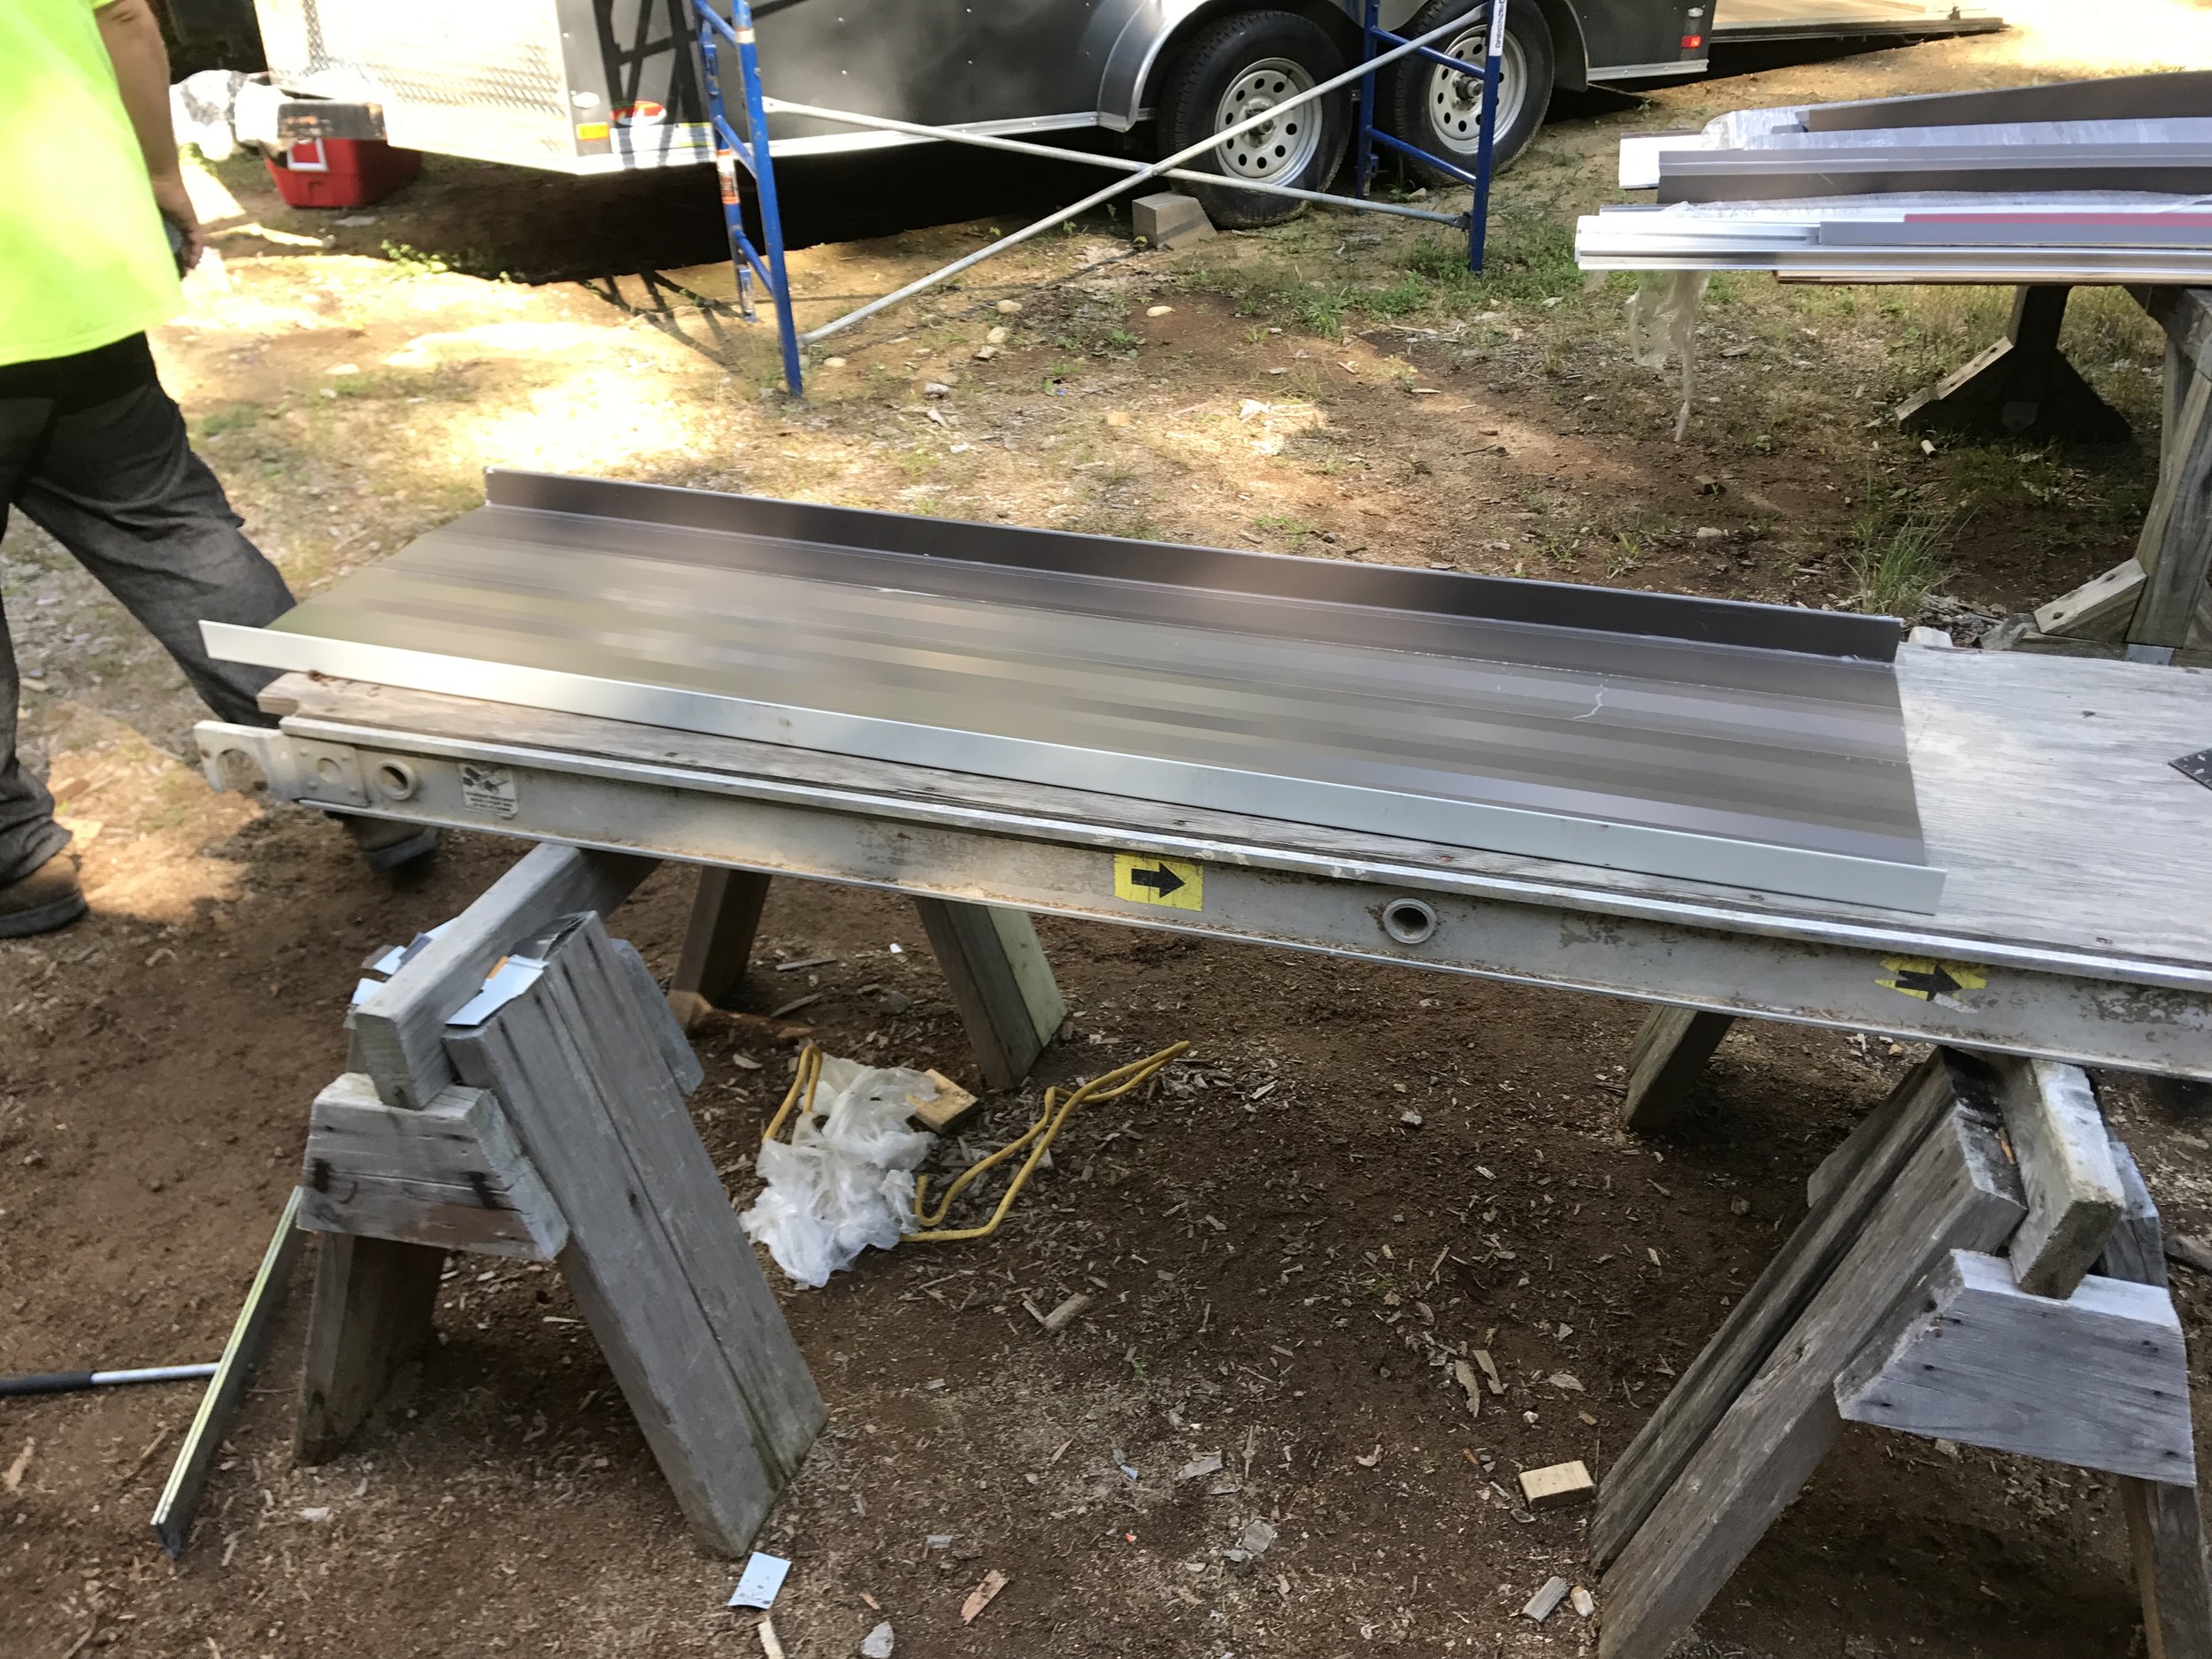
We hook the end of the panels onto the drop edge and secure with a single screw up at the top of the panel (where it will eventually be covered by the ridge). We then install (3) clips per panel on one side and screw down to the roof sheathing:

The next panel easily clips onto the white edge and conceals the clips we previously installed. The panels went VERY fast! It definitely helped to have one person at the roof’s ridge and one on a ladder, bringing the panels up and securing on the drip edge at the bottom while the other person secures it with the single screw at the top.
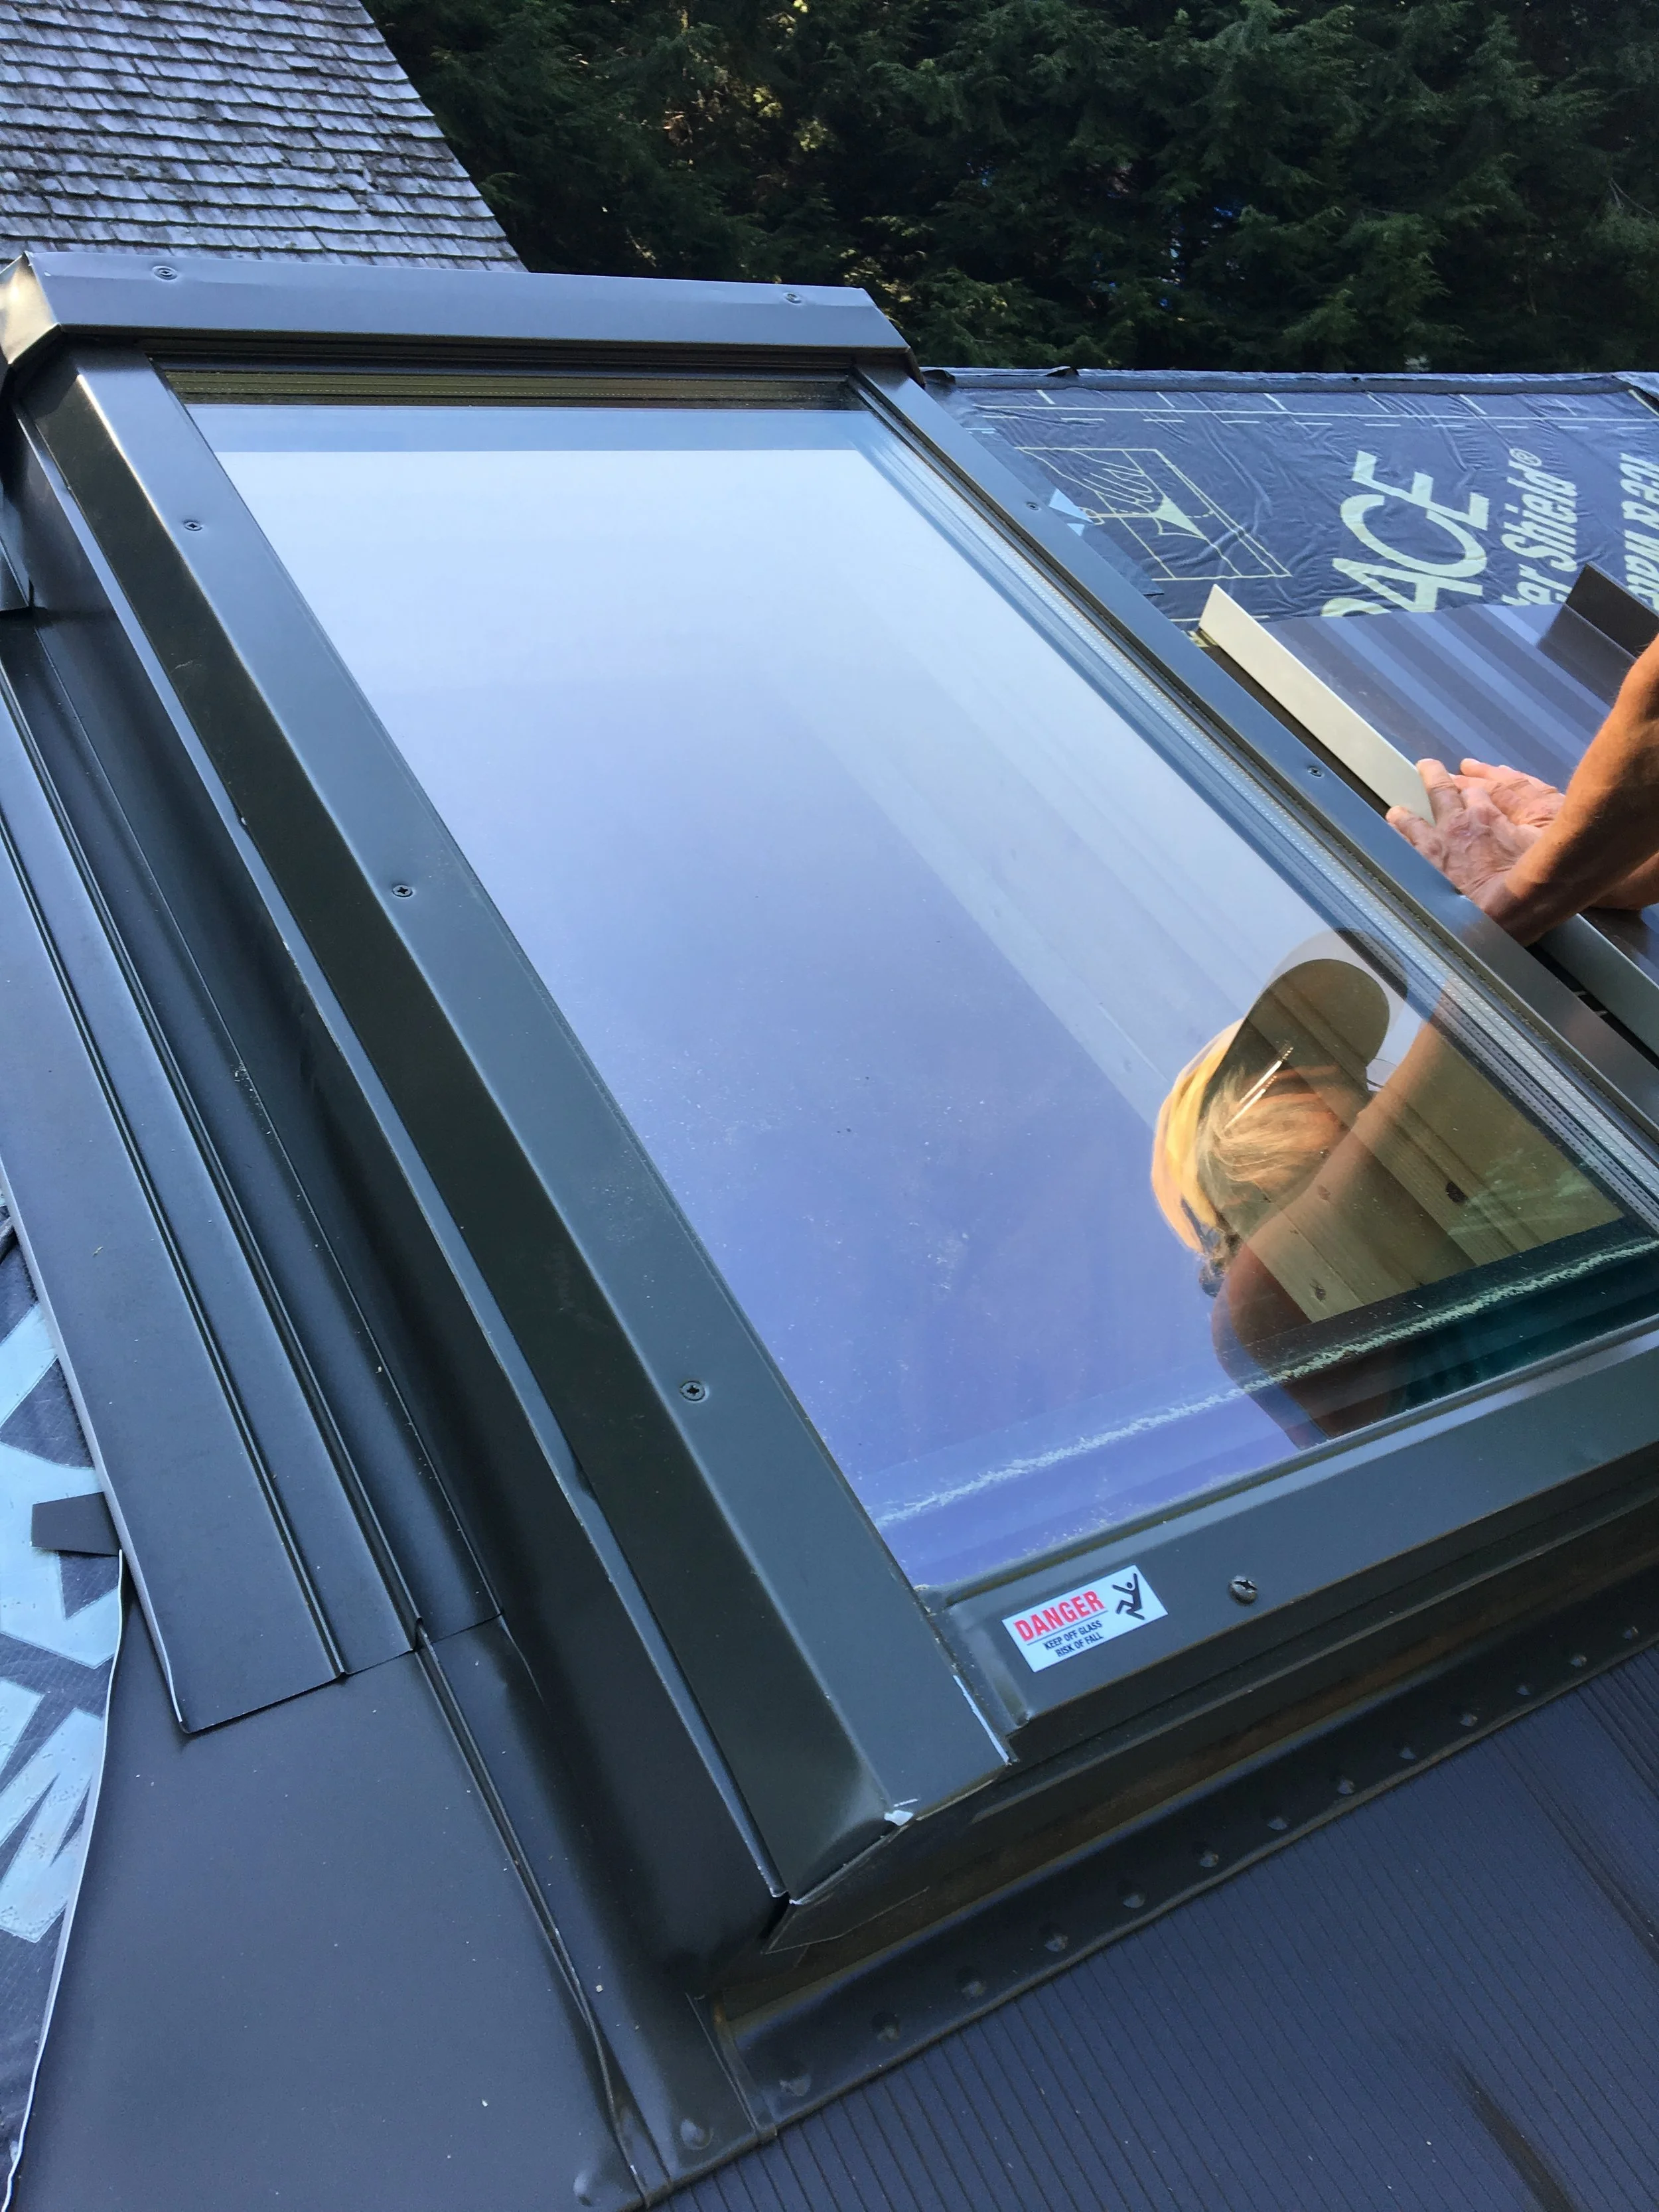
We paneled up to where we had to cut a hole for the kitchen’s skylight, then decided to install the skylight. We had put Grace Ice & Water Shield right over the hole so that it was watertight up until this point:


The most important part of installing a skylight is making sure you have purchased the correct flashing kit to use with the particular skylight.
For the kitchen skylight I purchased a Fakro venting skylight unit. Since the kitchen is directly between the front door and the patio door, I didn’t find it necessary to have an egress window here.
Along with the window, I purchased the proper Fakro flashing kit for installation. No matter which skylight you decide to install in your tiny, there should always be a specific flashing kit available.
When I purchased the skylights and their flashing kits, I was unsure where the metal seams of my roof would fall once the pattern reached the opening in the roof. Because of this, I purchased a flashing kit that is made specifically for “high-profile” roofing. This could mean clay shingles, corrugated metal roofing panels, etc. This means that the bottom portion of flashing is able to be installed over roofing that protrudes far off of your sheathing plane. In the following photo I am holding it in place where it will go after installing a panel beneath:


Directions are key! For the first skylight I framed the opening incorrectly not once, but TWICE! Gosh. How embarrassing. There are a series of crucial dimensions on skylights - make sure to pay attention to which are needed to cut and frame your opening!

The day after we finished the installation, it ferociously rained!

And there were ZERO leaks! What a happy girl I was that day. We were ready to continue our roofing panels on the opposite side of the window.
