Preparing the Floor
Because our gooseneck trailer came with a wooden-board deck, we did not have to put any new sheathing underneath our floor joists. We decided to lay down aluminum flashing over the deck of the trailer so that no bugs or critters could chew their way in.
Our good friend Cory came to help us!

With the blue tarp above, the shiny silver flashing appeared as water.

Cory just likes to hang out on the curved tie beam!

Then we laid down a 6-mil poly sheet, doubled, to act as a moisture barrier. After the poly was fixed in place we replaced the 4”-deep floor joists and lag-bolted them back into the sills.


Cutting the 4”-thick rigid insulation took some clamps, saw horses, a 2x4 as a straight edge, and two putty knives, sharpened along the sides. This wasn’t my favorite task so far; however, what was more frustrating was a lesson we learned the hard way…
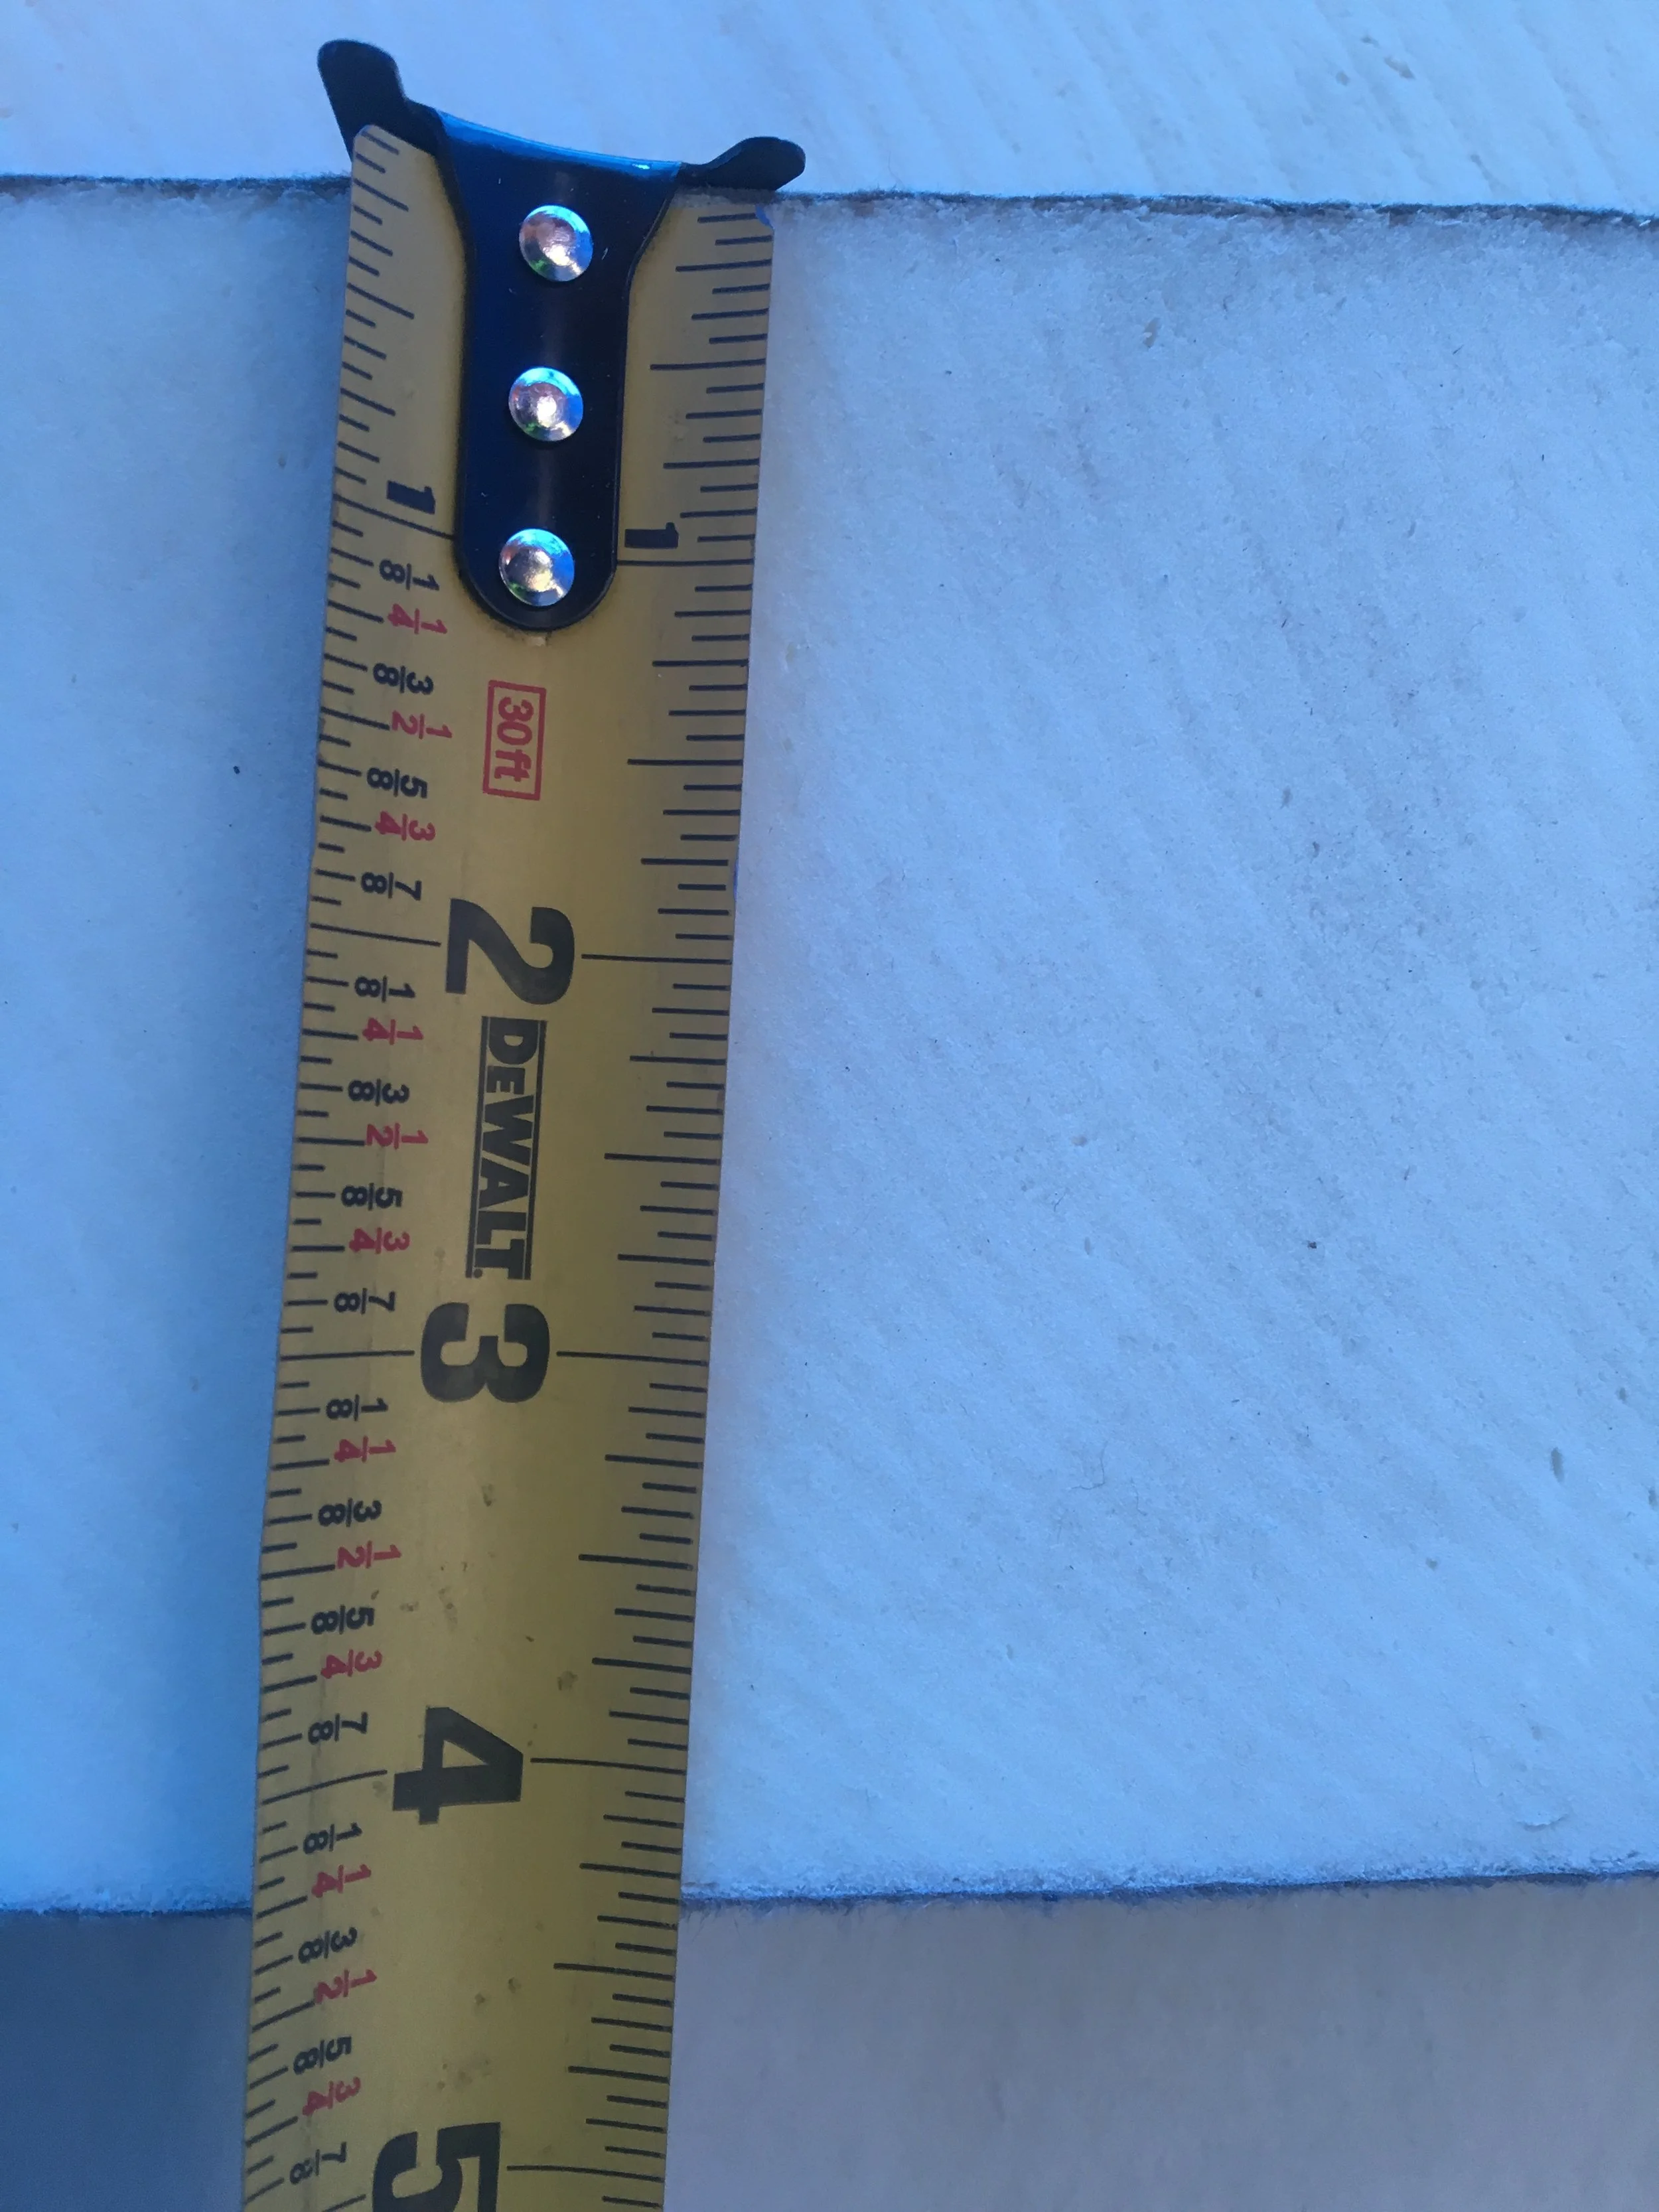
Half of the 4”-thick rigid insulation boards we purchased in Bennington were actually 4-3/8” thick. Brian and I had developed a smooth system for cutting the insulation and were cruising along when we realized that the cut sections we were laying down in the floor bays were not flush with the top of the floor joists.
At first we thought it was our tape from the edges of the poly bunching at the corners underneath and therefore not allowing the pieces to sit flat on the deck. Finally one fo us took the measuring tape to one of the edges and discovered the 4-3/8” dimension.

This meant we needed to find a way to skim that 3/8” off of the top of each sheet. NOT as easy as one might think!
Dad, Karen, and Brian spent a whole day clamping the sheets just right, laterally, and sawing off a level portion of the dense foam. WHAT A MESS!
The only good news there was that the 4-3/8” boards along with an extra 1”-thick board was the perfect thickness to fill the depth of the bedroom floor bays.
That day we learned to measure EVERYTHING we purchase, even if we’re told they are all the same size and thickness.

The bedroom was a little different. Since we created the size / shape / placement of the bedroom footprint and it wasn’t dictated by the shape of the trailer, we had to attach ZIP system up between the sills (but over the gooseneck) from below. We then had a platform on which to put the insulation.

After laying in all insulation, we used cans of gap filler to fill in all of the imperfections created by our cutting and the not-so-perfectly-90-degree angles. =)

Then it was time to use Liquid Nails on the floor joists and lay down 7/16” ZIP. We chose the 7/16” on the floor instead of the 5/8” only because we needed to gain as much vertical space as we could for Brian to be able to make it through doorways and under the storage loft! We screwed the sheets into the joists and sills using sub-flooring screws.
Our little house is now ready for sub-framing. Finish flooring comes much later on!


